Build Classified Ads Application
Architecture

Database : [Firebase Realtime Database](Firebase Realtime Database | Firebase Documentation)
Setting Up Project
create your 1st application, use BasicActivity template


Slicing Layout
in this case, we want to use just one Activity, and page will use fragment
List of Ads
-
use
firstFragment.ktaslistOfAds Fragment -
in this part, we use
recyclerviewto handle list of ads, andfloating buttonto opencreate ads page -
change
fragment_first.xml<androidx.coordinatorlayout.widget.CoordinatorLayout xmlns:android="http://schemas.android.com/apk/res/android" xmlns:tools="http://schemas.android.com/tools" android:layout_width="match_parent" android:layout_height="match_parent" xmlns:app="http://schemas.android.com/apk/res-auto" tools:context=".FirstFragment"> <androidx.recyclerview.widget.RecyclerView android:id="@+id/rv_list_ads" android:layout_width="match_parent" android:layout_height="match_parent" /> <com.google.android.material.floatingactionbutton.FloatingActionButton android:id="@+id/fab_create_ads" android:layout_width="wrap_content" android:layout_height="wrap_content" android:layout_gravity="bottom|end" android:layout_marginEnd="@dimen/fab_margin" android:layout_marginBottom="16dp" app:srcCompat="@android:drawable/ic_input_add" /> </androidx.coordinatorlayout.widget.CoordinatorLayout>
-
create new layout file to showing the ads item
item_ads.xml<?xml version="1.0" encoding="utf-8"?> <androidx.cardview.widget.CardView android:id="@+id/container_ads" android:layout_width="match_parent" android:layout_height="wrap_content" android:layout_marginHorizontal="16dp" android:layout_marginTop="16dp" app:cardCornerRadius="8dp" xmlns:android="http://schemas.android.com/apk/res/android" xmlns:app="http://schemas.android.com/apk/res-auto"> <LinearLayout android:padding="16dp" android:orientation="vertical" android:layout_width="match_parent" android:layout_height="wrap_content"> <androidx.appcompat.widget.AppCompatTextView android:id="@+id/tv_title_ads" android:layout_width="match_parent" android:layout_height="wrap_content" android:text="Honda Brio 2014" android:textAppearance="@style/TextAppearance.AppCompat.Large" android:textSize="16sp" android:textStyle="bold" /> <androidx.appcompat.widget.AppCompatTextView android:id="@+id/tv_price_ads" android:text="Rp12.000.000" android:layout_width="match_parent" android:layout_height="wrap_content"/> <LinearLayout android:layout_width="match_parent" android:layout_height="wrap_content"> <androidx.appcompat.widget.AppCompatImageView android:src="@android:drawable/ic_input_get" android:layout_width="20dp" android:layout_height="20dp"/> <TextView android:id="@+id/tv_location_ads" android:layout_width="match_parent" android:layout_height="wrap_content" android:ellipsize="end" android:maxLines="1" android:paddingLeft="8dp" android:text="Kembangan, Jakarta Barat" android:textAppearance="@style/TextAppearance.AppCompat.Small" android:textColor="@color/teal_700" /> </LinearLayout> </LinearLayout> </androidx.cardview.widget.CardView>
-
to handle the object of data, we need to create
data classsample of data structure
{
    "author": "PT Red Bird",
    "description": "Mau Jual Untung aja nih bos kalo lo mau",
    "location": "Kembangan, Jakarta Barat",
    "price": "Rp130.000.000",
    "title": "Honda Mobilio Ex. Taxi"
}
create the dataclass with new package
models/Ads.ktdata class Ads( var author: String = "", var description: String = "", var location: String = "", var price: String = "", var title: String = "" )
because we don't have data source for now, we need to generate dummy data. You can create generator inside
Adsdata class, so you can modify to becompanion object { fun generateDummyAds(): List<Ads> { val listOfAds = arrayListOf<Ads>() for (i in 1..10) { if (i%2==0) { listOfAds.add( Ads( author = "Samsul Arifin", description = "OLX Autos adalah solusi terbaik untuk jual mobil secara instan, aman dan nyaman. Dapatkan harga terbaik sesuai dengan kondisi mobil kamu.", location = "Kembangan, Jakarta Barat", price = "Rp175.000.000", title = "Honda Brio RS 2015", ) ) } else { listOfAds.add( Ads( author = "Hamka Hamzah", description = "Mesin asli bensin\n" + "4x4 aktif.\n" + "Surat surat lengkap.\n" + "Pajak hidup.\n" + "power steering\n" + "Sudah pakek pakum rem", location = "Kembangan, Jakarta Barat", price = "Rp75.000.000", title = "Hyundai Atoz 2008", ) ) } } return listOfAds } }
-
Create adapter to handle recyclerview item, you need to
AdsAdapter.ktto create Recyclerview Adapter insideadapters/AdsAdapter.ktpackage [references]class AdsAdapter(private val items: List<Ads>, private val listener: AdsListener): RecyclerView.Adapter<AdsAdapter.AdsViewHolder>() { inner class AdsViewHolder(val binding: ItemAdsBinding): RecyclerView.ViewHolder(binding.root) override fun onCreateViewHolder(parent: ViewGroup, viewType: Int): AdsViewHolder { val binding = ItemAdsBinding.inflate(LayoutInflater.from(parent.context), parent, false) return AdsViewHolder(binding) } override fun onBindViewHolder(holder: AdsViewHolder, position: Int) { with(holder) { with(items[position]) { binding.tvTitleAds.text = this.title binding.tvLocationAds.text = this.location binding.tvPriceAds.text = this.price binding.containerAds.setOnClickListener { listener.onClickAds(this) } } } } override fun getItemCount(): Int = items.size }
to handle click event to your item, you need to write interface as a callback event, create new interface
AdsListenerinsideadapterspackageinterface AdsListener { fun onClickAds(ads: Ads) }
-
Modify your
firstFragment.ktclass FirstFragment : Fragment(), AdsListener { private var _binding: FragmentFirstBinding? = null private val binding get() = _binding!! private val database by lazy { Database() } private var listOfAds: ArrayList<Ads> = arrayListOf() private lateinit var adsAdapter : AdsAdapter override fun onCreateView( inflater: LayoutInflater, container: ViewGroup?, savedInstanceState: Bundle? ): View? { _binding = FragmentFirstBinding.inflate(inflater, container, false) adsAdapter = AdsAdapter(listOfAds, this) return binding.root } override fun onViewCreated(view: View, savedInstanceState: Bundle?) { super.onViewCreated(view, savedInstanceState) with(binding.rvListAds) { adapter = adsAdapter layoutManager = LinearLayoutManager(requireContext()) } } override fun onDestroyView() { super.onDestroyView() _binding = null } override fun onClickAds(ads: Ads) { // TODO: go to detail page } }
Detail Page
-
change the layout
fragment_second.xml<?xml version="1.0" encoding="utf-8"?> <LinearLayout xmlns:android="http://schemas.android.com/apk/res/android" xmlns:tools="http://schemas.android.com/tools" android:layout_width="match_parent" android:layout_height="match_parent" android:orientation="vertical" android:padding="16dp" tools:context=".SecondFragment"> <androidx.appcompat.widget.AppCompatTextView android:id="@+id/tv_title_detail" android:layout_width="match_parent" android:layout_height="wrap_content" android:text="Honda Brio 2014" android:textAppearance="@style/TextAppearance.AppCompat.Large" android:textStyle="bold" /> <androidx.appcompat.widget.AppCompatTextView android:id="@+id/tv_price_detail" android:layout_width="match_parent" android:layout_height="wrap_content" android:text="Rp200.000.000" android:layout_marginTop="8dp" android:textAppearance="@style/TextAppearance.AppCompat.Body2" /> <LinearLayout android:layout_marginTop="4dp" android:layout_width="match_parent" android:layout_height="wrap_content"> <androidx.appcompat.widget.AppCompatImageView android:src="@android:drawable/ic_input_get" android:layout_width="20dp" android:layout_height="20dp"/> <TextView android:id="@+id/tv_location_detail" android:layout_width="match_parent" android:layout_height="wrap_content" android:ellipsize="end" android:maxLines="1" android:paddingLeft="8dp" android:text="Kembangan, Jakarta Barat" android:textAppearance="@style/TextAppearance.AppCompat.Small" android:textColor="@color/teal_700" /> </LinearLayout> <View android:background="@color/black" android:layout_marginVertical="16dp" android:layout_width="match_parent" android:layout_height="1dp" /> <androidx.appcompat.widget.AppCompatTextView android:id="@+id/tv_author_detail" android:layout_width="match_parent" android:layout_height="wrap_content" android:text="Oleh: Ahmad Yamin" android:textAppearance="@style/TextAppearance.AppCompat.Body2" /> <androidx.appcompat.widget.AppCompatTextView android:id="@+id/tv_desc_detail" android:layout_width="match_parent" android:layout_height="wrap_content" android:layout_marginTop="8dp" android:text="Dijual Mobil Keren Kece Idaman Anak Muda" android:textAppearance="@style/TextAppearance.AppCompat.Small" /> </LinearLayout>
-
in the detail page, you just need to show the data which passing from ads list, so you can consume the data from
Bundle[references] -
modify
adsdata class asParcelable, before that you need to add plugins into you gradle appplugins { ...your default plugin id 'kotlin-parcelize' }@Parcelize data class Ads( var author: String = "", var description: String = "", var location: String = "", var price: String = "", var title: String = "" ): Parcelable
handle argument with navigation graph [references]

-
modify your
SecondFragment.ktclass SecondFragment : Fragment() { private var _binding: FragmentSecondBinding? = null private val binding get() = _binding!! override fun onCreateView( inflater: LayoutInflater, container: ViewGroup?, savedInstanceState: Bundle? ): View? { _binding = FragmentSecondBinding.inflate(inflater, container, false) return binding.root } override fun onViewCreated(view: View, savedInstanceState: Bundle?) { super.onViewCreated(view, savedInstanceState) (arguments?.get("ads") as Ads?)?.let { ads -> binding.tvTitleDetail.text = ads.title binding.tvAuthorDetail.text = ads.author binding.tvDescDetail.text = ads.description binding.tvPriceDetail.text = ads.price binding.tvLocationDetail.text = ads.location } } override fun onDestroyView() { super.onDestroyView() _binding = null } }
Handle From List Page to Detail Page
-
modify your
onClickAdslistener to opensecondFragmentand passing the ads dataoverride fun onClickAds(ads: Ads) { findNavController().navigate(R.id.action_FirstFragment_to_SecondFragment, bundleOf("ads" to ads)) }
Connect to Firebase
-
simply you can use assistant feature in Android studio to connect your project with Firebase
tools -> firebase -> Realtime Database -
firebase assistant will open on you sidebar, you just need to click
connectto implement firebase in your project. -
create class to handle all of
databasetransaction. CreateDatabase.ktinsideutils/Database.ktpackageclass Database { private val path = "ads" private var database: FirebaseDatabase = FirebaseDatabase.getInstance() private fun getReference(): DatabaseReference { return database.getReference(path) } // function to create new Ads fun createAds(ads: Ads) { getReference().push().setValue(ads) } // function to read ads fun readAds(onSuccess: (List<Ads>) -> (Unit), onError: (Any?) -> Unit) { getReference().addValueEventListener(object : ValueEventListener{ override fun onDataChange(data: DataSnapshot) { val items = arrayListOf<Ads>() for (item: DataSnapshot in data.children) { val adsParser = item.getValue(Ads::class.java) items.add(adsParser!!) } onSuccess(items) } override fun onCancelled(p0: DatabaseError) { onError(p0) } }) } }
Create "Create Ads" page
-
create new fragment (class and layout)
-
create_ads_fragment.xml<?xml version="1.0" encoding="utf-8"?> <LinearLayout android:orientation="vertical" xmlns:android="http://schemas.android.com/apk/res/android" xmlns:tools="http://schemas.android.com/tools" android:padding="16dp" android:layout_width="match_parent" android:layout_height="match_parent" tools:context=".CreateAdsFragment"> <androidx.appcompat.widget.AppCompatEditText android:id="@+id/et_title" android:hint="Title Ads" android:layout_marginBottom="8dp" android:layout_width="match_parent" android:layout_height="wrap_content" /> <androidx.appcompat.widget.AppCompatEditText android:id="@+id/et_author" android:hint="Yourname" android:layout_marginBottom="8dp" android:layout_width="match_parent" android:layout_height="wrap_content" /> <androidx.appcompat.widget.AppCompatEditText android:id="@+id/et_price" android:hint="Price" android:layout_marginBottom="8dp" android:layout_width="match_parent" android:layout_height="wrap_content" /> <androidx.appcompat.widget.AppCompatEditText android:id="@+id/et_location" android:hint="Location" android:layout_marginBottom="8dp" android:layout_width="match_parent" android:layout_height="wrap_content" /> <androidx.appcompat.widget.AppCompatEditText android:id="@+id/et_desc" android:hint="Description Ads" android:lines="4" android:layout_marginBottom="8dp" android:layout_width="match_parent" android:layout_height="wrap_content" /> <androidx.appcompat.widget.AppCompatButton android:id="@+id/btn_save" android:text="Save Ads" android:textAllCaps="false" android:layout_width="match_parent" android:layout_height="wrap_content"/> </LinearLayout>

-
CreateAdsFragment.ktclass CreateAdsFragment : Fragment() { private var _binding: FragmentCreateAdsBinding? = null private val binding get() = _binding!! override fun onCreateView( inflater: LayoutInflater, container: ViewGroup?, savedInstanceState: Bundle? ): View? { // Inflate the layout for this fragment _binding = FragmentCreateAdsBinding.inflate(inflater, container, false) return binding.root } override fun onViewCreated(view: View, savedInstanceState: Bundle?) { super.onViewCreated(view, savedInstanceState) binding.btnSave.setOnClickListener { // TODO : save item val ads = Ads( author = binding.etAuthor.text.toString(), title = binding.etTitle.text.toString(), price = binding.etPrice.text.toString(), location = binding.etLocation.text.toString(), description = binding.etDesc.text.toString() ) } } override fun onDestroyView() { super.onDestroyView() _binding = null } }
-
Add save functionality, you need to initialization the
Database.ktto your fragmentprivate val database by lazy { Database() } // modify save button binding.btnSave.setOnClickListener { // TODO : save item val ads = Ads( author = binding.etAuthor.text.toString(), title = binding.etTitle.text.toString(), price = binding.etPrice.text.toString(), location = binding.etLocation.text.toString(), description = binding.etDesc.text.toString() ) database.createAds(ads) }
Load List Ads from Database
modify your firstFragment.kt
private val database by lazy { Database() }


override fun onViewCreated(view: View, savedInstanceState: Bundle?) {

    binding.fabCreateAds.setOnClickListener {
         findNavController().navigate(R.id.action_FirstFragment_to_createAdsFragment)
    }
}


override fun onCreate(savedInstanceState: Bundle?) {
        super.onCreate(savedInstanceState)
        database.readAds(
            onError = { err ->
                Toast.makeText(requireContext(), "Error: $err", Toast.LENGTH_SHORT).show()
            } , onSuccess = { items ->
                listOfAds.clear()
                listOfAds.addAll(items)
                adsAdapter.notifyDataSetChanged()
            } )
    }
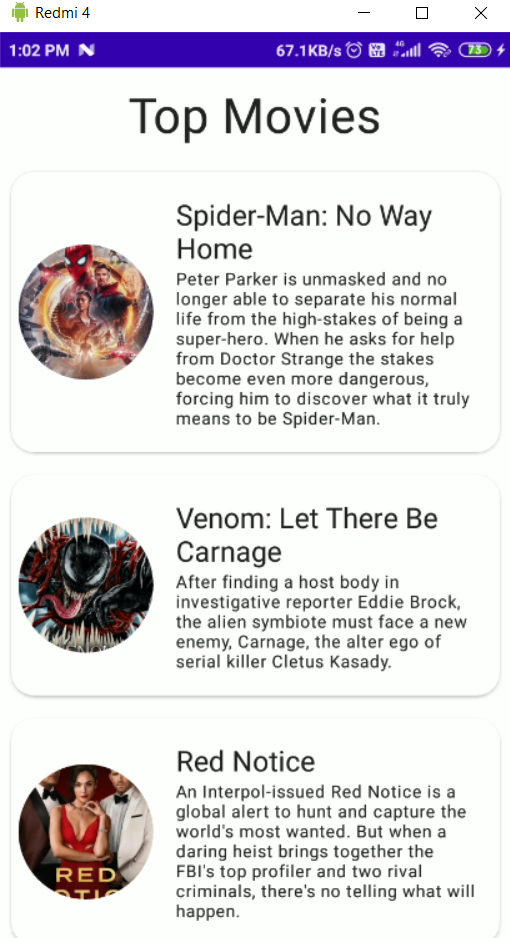
Result


 0 May 2, 2022
 21 Dec 22, 2022
 985 Jan 1, 2023

 25 Dec 15, 2022
 0 Oct 6, 2021
 2 Aug 18, 2022
 7 Dec 17, 2022

 3 Dec 14, 2022
 2.2k Dec 29, 2022

 9 Nov 25, 2022
 2 Jun 23, 2022
 71 Dec 17, 2022
 670 Dec 31, 2022
 11 Oct 12, 2021
 50 Dec 30, 2022
 17 Sep 12, 2022